Page 1 of 3
Irish's CBH Old School Chopper Project
Posted: Thu Jan 12, 2012 12:29 am
by IRISH
I'm going to re-build my original build log - Please Don't Post in here until it's done. Thanks, Craig
This thread will be mostly pictures to begin with. I believe the old saying is true about a picture being worth a thousand words.
This is a bike I built a few years ago using the original "Chopper Builders Handbook" by Gary W.
I am missing some pictures that were in the original log, but hopefully they still exist somewhere and can be retrieved eventually.
Keep in mind that this bike was built by me in 2005 - 2006 in my garage. The only tools used were a tubing bender, Lincholn 155 MIG welder, a drill press, grinders and hand tools. I am not a machinist. I am a mechanic. I don't even have a lathe. I did not purchase any plans or blueprints, I only followed the article on the Chopper Builders Handbook. I'm not tooting my own horn just making the point that if I can do this anybody with some mechanical skills can do it.
Re: Irish's CBH Old School Chopper Project
Posted: Thu Jan 12, 2012 1:08 am
by IRISH
Re: Irish's CBH Old School Chopper Project
Posted: Fri Jan 13, 2012 3:12 am
by IRISH
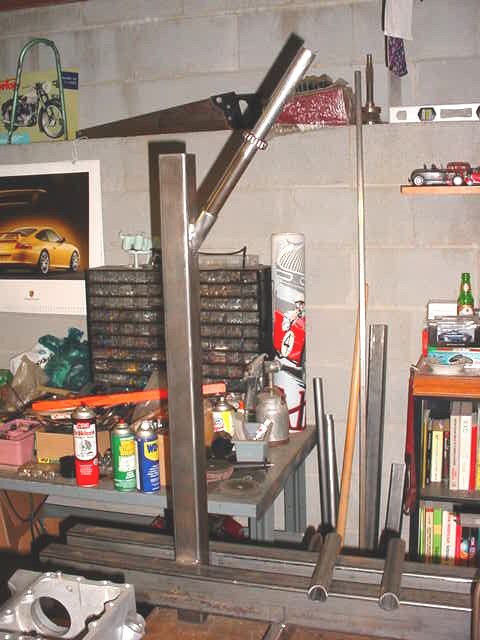
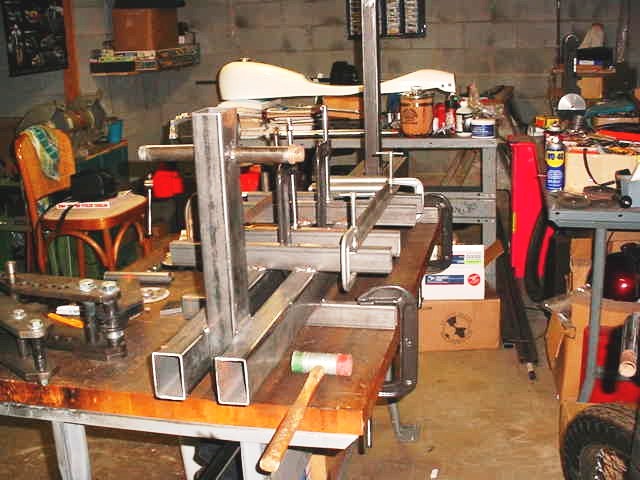
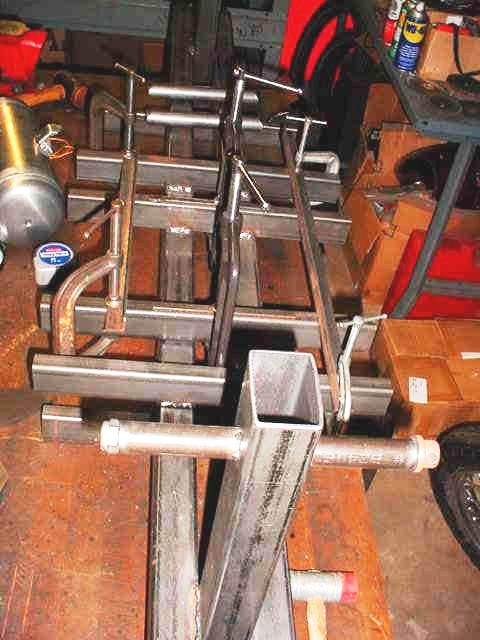
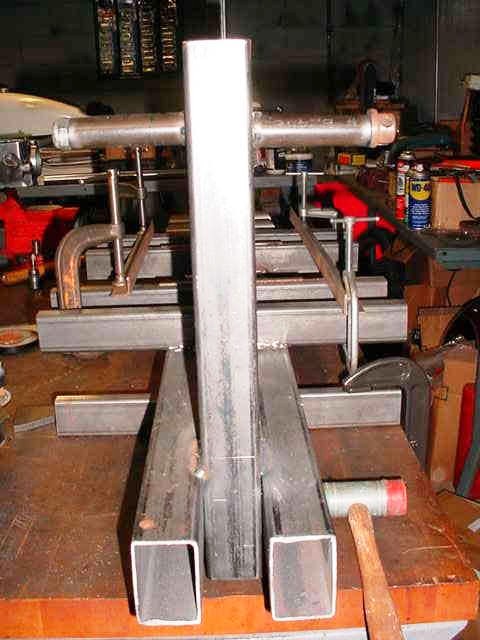
These are pictures of the frame jig I put together first. When I got the angle I wanted on the neck (35 degrees) I welded the tube on to the upright so it's not adjustable like some the fancy jigs. The bike when finished ended up with 38 degrees of rake.
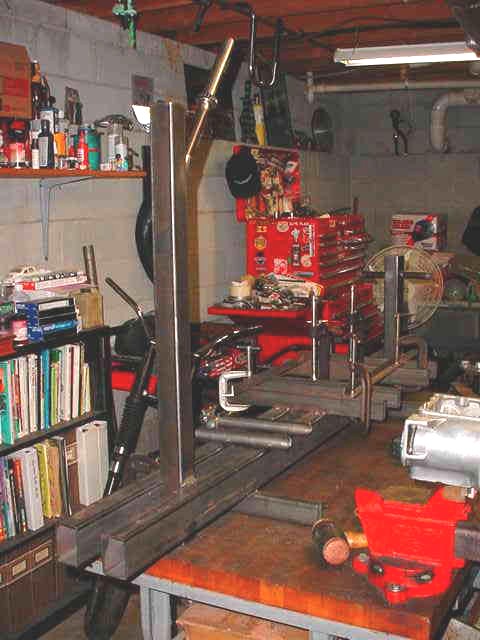
- jig3.jpg (66.53 KiB) Viewed 7974 times
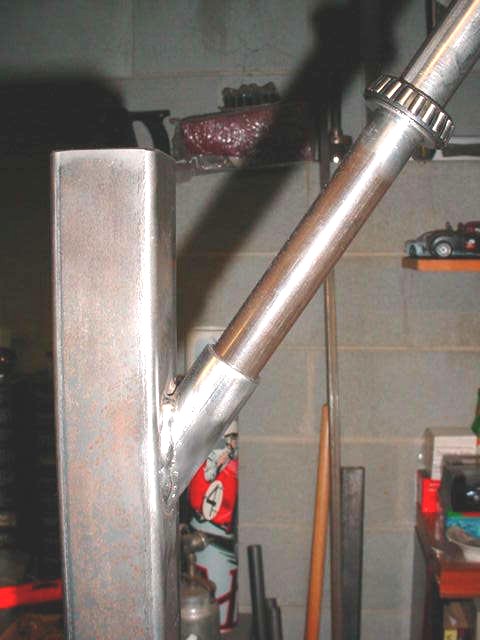
The smaller tube is 1" which fits into the short piece of 1.125" that welded to the upright. There is a tapered bearing still stuck on the tube.
- jig1.jpg (66.64 KiB) Viewed 7974 times
- jig8.jpg (52.9 KiB) Viewed 7974 times
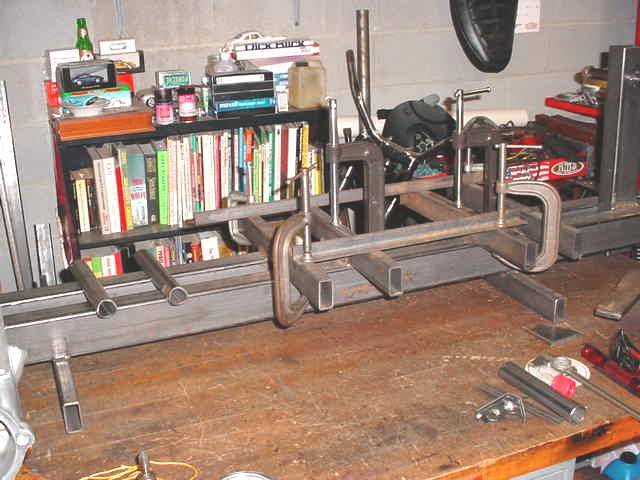
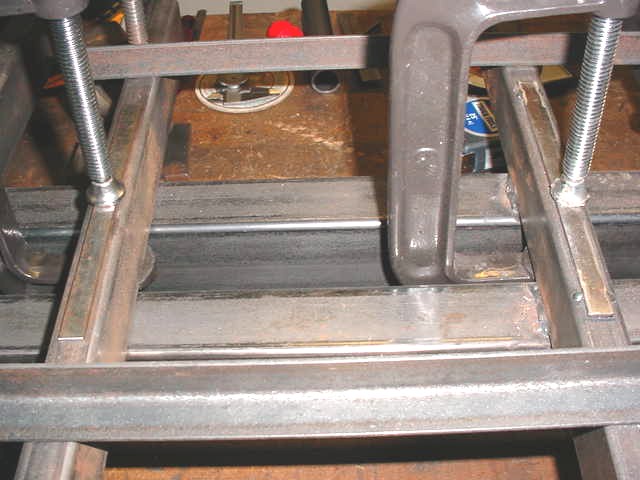
The center part of the jig. I used the angle iron clamped to the cross pieces to hold the outside of the tubes and the fish-mouthed tubes to hold them apart at the correct distance.
- jig2.jpg (74.02 KiB) Viewed 7974 times

- jig11.jpg (68.08 KiB) Viewed 7974 times
I attached some spacers (.125 x .5 strap) to raise the cross braces up to the proper position.
- jig6.jpg (61.22 KiB) Viewed 7974 times
Re: Irish's CBH Old School Chopper Project
Posted: Fri Jan 13, 2012 3:18 am
by IRISH
The rear axle plate locating fixture.
- jig12.jpg (74.3 KiB) Viewed 7974 times
- jig11.jpg (68.08 KiB) Viewed 7974 times
The tubing is 1" to hold the axle.
- jig5.jpg (64.43 KiB) Viewed 7974 times
Re: Irish's CBH Old School Chopper Project
Posted: Fri Jan 13, 2012 4:06 am
by IRISH
This frame was built by following the directions as written in the Chopper Builders Handbook by Gary which is here:
http://chopperhandbook.com/oldschool1.htm
I started by cutting the seat tube cross member which is 1 x 2 rectangular tube and seat tube which I cut at one end at a 17 deg. angle. The seat tube was then welded in the center of the cross member. This is the first part of the frame to go together.
- frame7.jpg (46.93 KiB) Viewed 7971 times
I'm missing some pictures, but you can see the seat tube attached to the seat tube cross member (x-member). The trans is bolted in here.
- MVC-896S.JPG (39.34 KiB) Viewed 7971 times
- MVC-893S.JPG (38.71 KiB) Viewed 7971 times
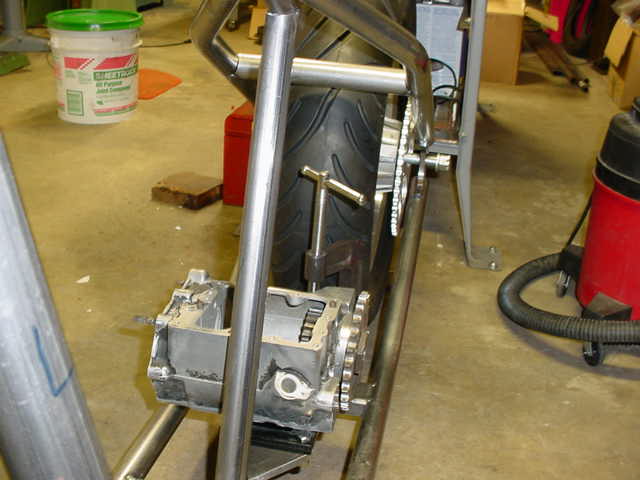
I'm showing the seat tube here, but this is obviously later in the construction. I was checking the sprocket alignment.
This shows the lower tubes after I bent them and the rear seat stays and top tube in the jig.
- frame1a.jpg (94.17 KiB) Viewed 7971 times
I had tacked the seat stays to the top tube and the seat tube to the top tube at this point. The picture below shows this part of the frame later, after I had finished welding.
- MVC-914S.JPG (49.68 KiB) Viewed 7971 times
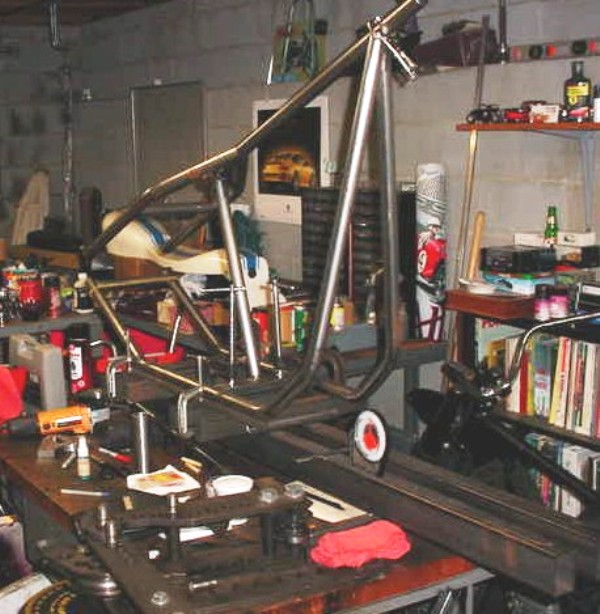
This picture shows the frame lower tubes clamped in the jig and the seat post X-member tacked. You can also see where I had to add an 1.5 inches to the right side because I bent it wrong and it came out short. I debated about whether to bend another piece, but decided to cut it and add a piece in. This worked out good because it allowed me to rotate the rear leg and get it perfectly square with the axle plates. The repair was done properly with a tube inside and it was drilled and welded.
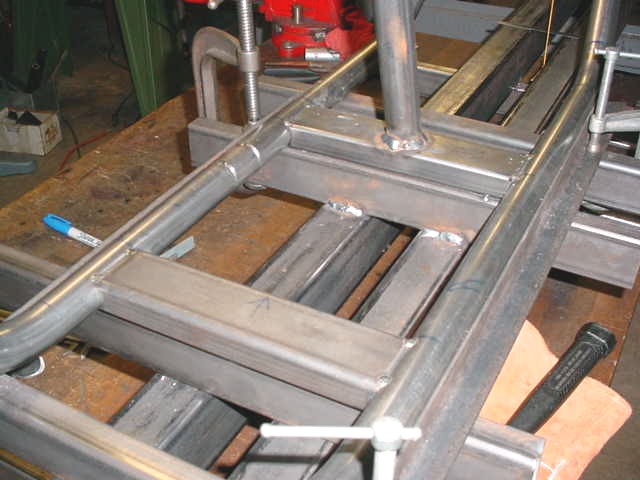
- frame5.jpg (62.17 KiB) Viewed 7971 times
Re: Irish's CBH Old School Chopper Project
Posted: Fri Jan 13, 2012 4:28 am
by IRISH
Re: Irish's CBH Old School Chopper Project
Posted: Fri Jan 13, 2012 4:56 am
by IRISH
Re: Irish's CBH Old School Chopper Project
Posted: Fri Jan 13, 2012 5:41 am
by IRISH
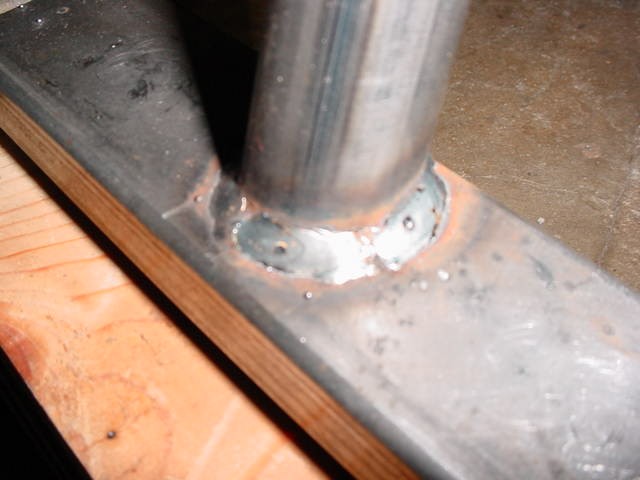
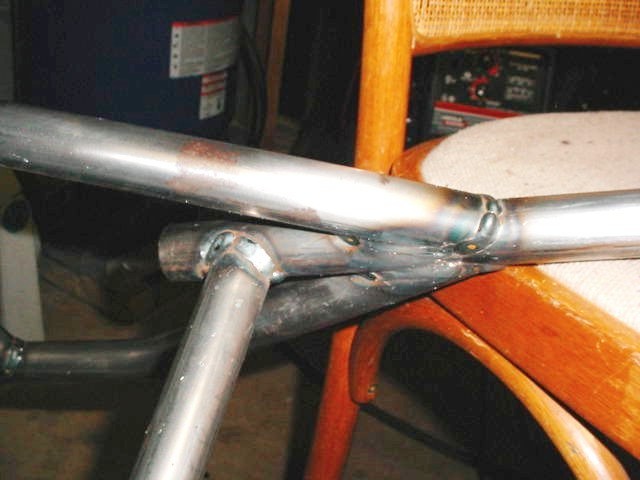
When I figured out the rake angle I wanted on the frame - 35 degrees from 90 - I put the frame back in the jig and located the steering tube (neck) on the jig and decided to weld the steering tube fixture to the jig to hold it in place. I had a straight piece of thick wall tubing for the neck which I cut to length and then squared up in a lathe. I installed a set of bearing cups in the neck and I installed a tapered bearing on the neck fixture of the jig. I then slid another tapered bearing down into the top cup to securely hold the neck in place. I then cut and coped the top tube and fitted it carefully to the neck. The I welded the neck to the top tube and lower tubes which is shown in the pictures below.
- MVC-810S.JPG (33.38 KiB) Viewed 7968 times
- MVC-920S.JPG (33.83 KiB) Viewed 7968 times
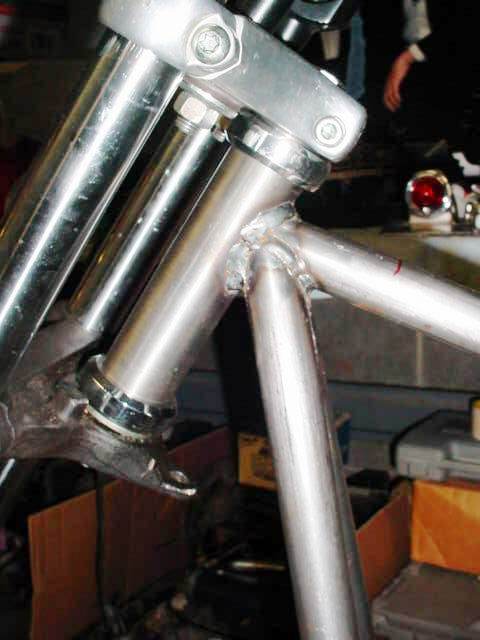
I then needed to figure out what length forks I needed. I am missing the photos of how I measured for that. It turned out that I needed 6 inch over tubes for the 39mm Narrow Glide (Sportster/FX) front end that I had. I found a set and you see them mounted in the photos.
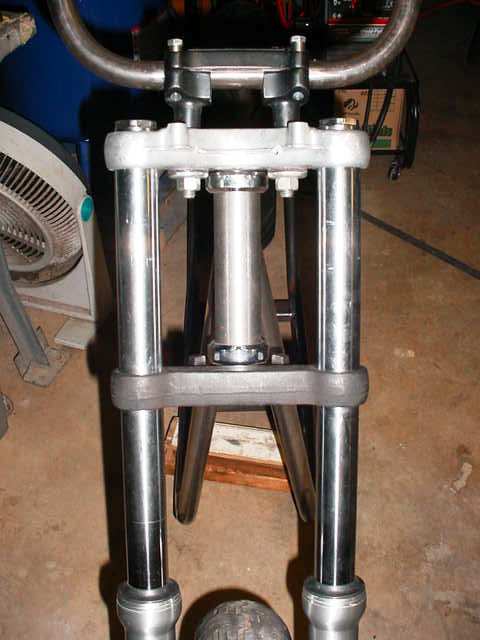
- MVC-809S.JPG (32.62 KiB) Viewed 7968 times
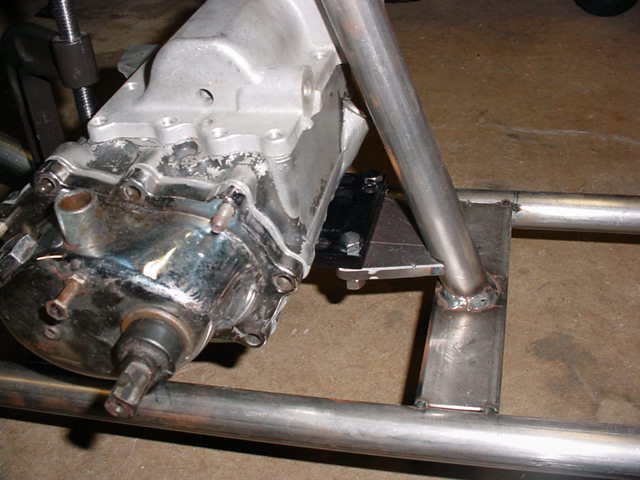
Next I'll show the engine and transmission mounts finished, I am missing some crucial photos that were in my original build log. The method I used to locate the mounts was: I bolted an S&S bare engine case and a 4-speed transmission case together using and inner primary housing. I also bolted a 4-speed trans mounting plate to the transmission case. I also bolted the rear engine mount to the the engine case and the front trans mount to the trans plate. I had cut those out of the same 3/8" material that I cut the rear axle plates from. The inner primary and trans were both 1970 FL Shovelhead type and the engine case was an Evo, which is basically the same dimensions as a Shovelhead case. With this unit all bolted together I located it in the frame and then fabricated the front engine mount out of 1 inch square bar. I also drilled and threaded some 3/4" round bar for the rear trans mounts and drilled the trans mount x-member to 3/4" on the top side and 3/8" on the bottom side so they would drop into the x-member. I bolted those to the rear of the trans plate and bolted the front mount onto the front of the engine case and squared and centered the whole unit in the frame front to rear and side to side. Then I welded the mounts to the frame in several points so they would not move. I then removed the engine and transmission cases and trans plate and finished welding the mounts in.
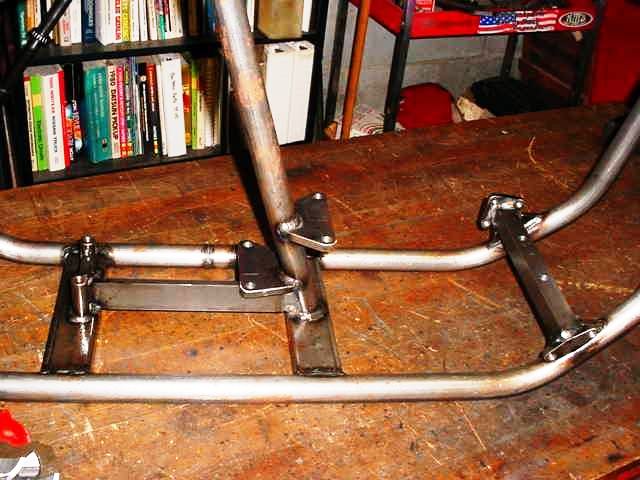
- Engine Trans Mounts 1.JPG (58.88 KiB) Viewed 7968 times
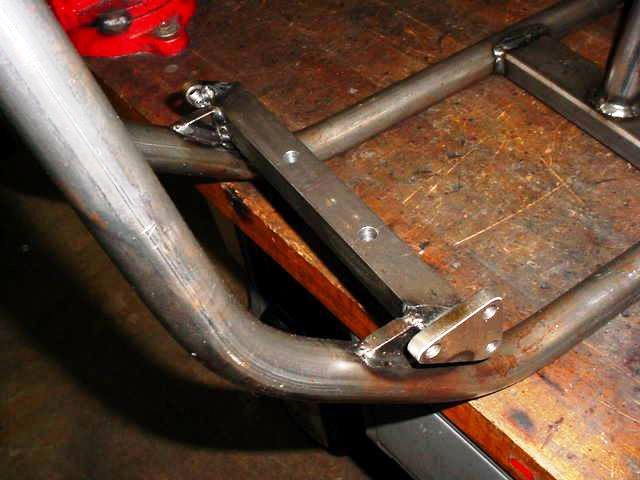
- Engine Trans Mounts 2.JPG (44.71 KiB) Viewed 7968 times
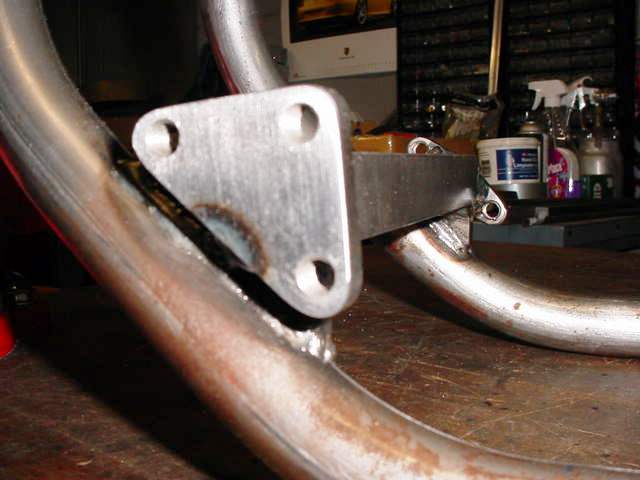
- Engine Trans Mounts 3.JPG (32.19 KiB) Viewed 7968 times
I also cut and fabricated the forward control mounts for the left and right sides and welded them to the ends of the front engine mount.
Re: Irish's CBH Old School Chopper Project
Posted: Fri Jan 13, 2012 5:54 am
by IRISH
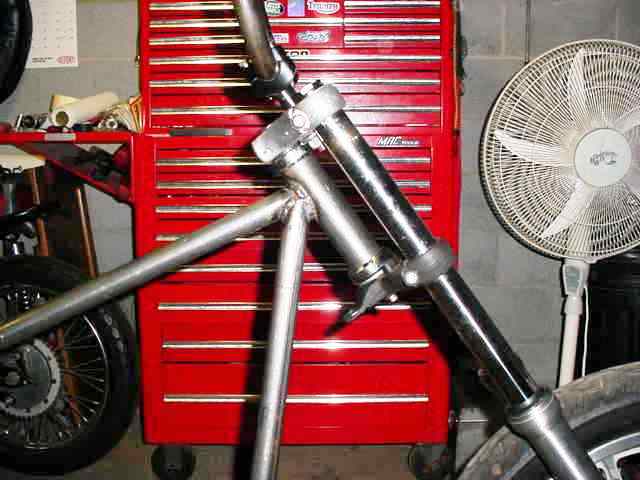
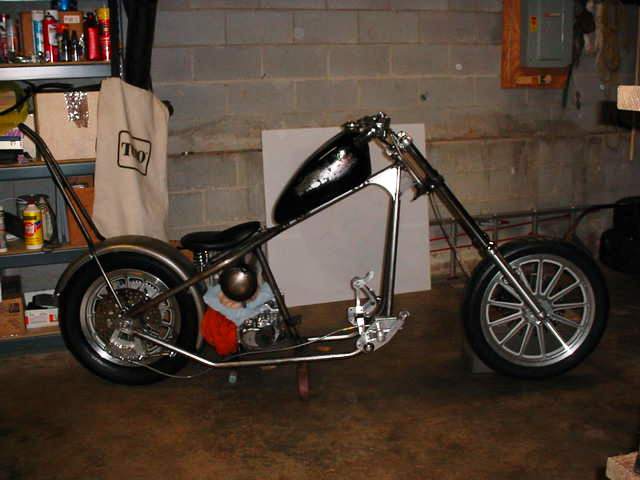
These two pictures show the frame mocked up with the original length front end, which you can see is way too low. I was also experimenting with tall 20" ape hanger handle bars that I bent up out of 1" chro-moly tubing.
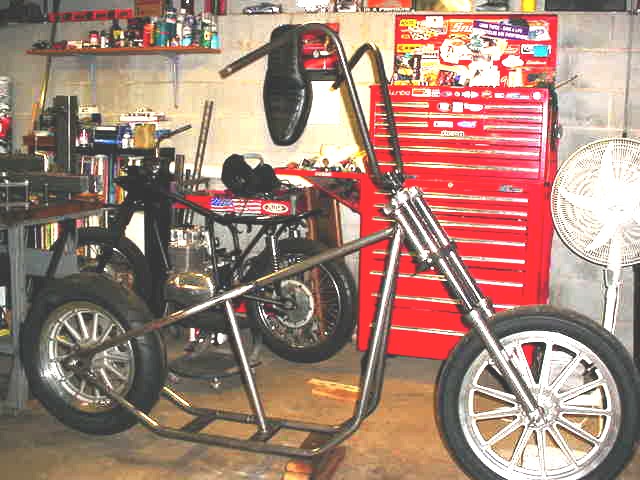
- frame9.jpg (91.29 KiB) Viewed 7967 times

- frame10.jpg (69.08 KiB) Viewed 7967 times
Re: Irish's CBH Old School Chopper Project
Posted: Sat Jan 14, 2012 3:39 pm
by IRISH
Re: Irish's CBH Old School Chopper Project
Posted: Sat Jan 14, 2012 3:46 pm
by IRISH
Re: Irish's CBH Old School Chopper Project
Posted: Sat Jan 14, 2012 3:53 pm
by IRISH
Re: Irish's CBH Old School Chopper Project
Posted: Sat Jan 14, 2012 4:14 pm
by IRISH
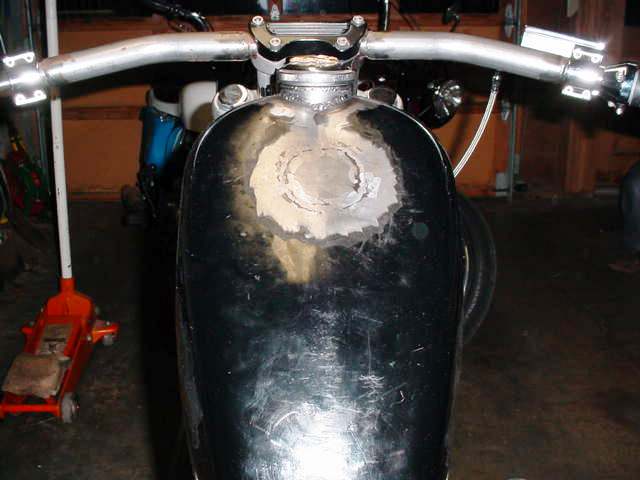
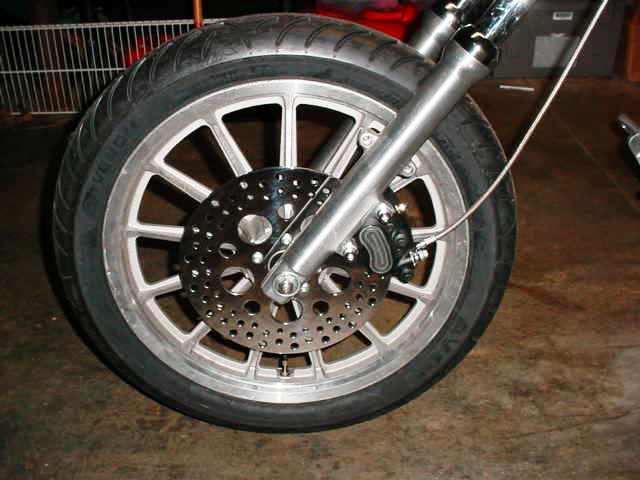
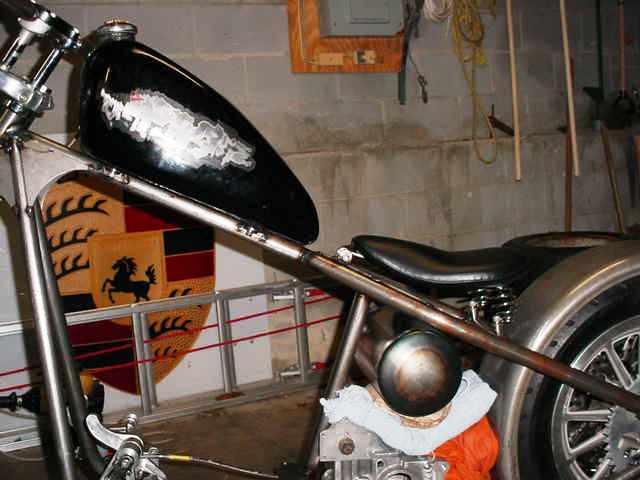
My friend Bob who gave me the wheel from his '97 Sportster when he changed them out for some different ones, also gave me the fuel tank from the same bike when he changed that out for a larger unit. I love this style Sporty tank, it's my favorite one of them all. With this one I went with the Frisco look. I cut the tunnel out and welded a flat bottom in. I then relocated the filler cap more forward. I would later use this same type tank, although with the tunnel left in.
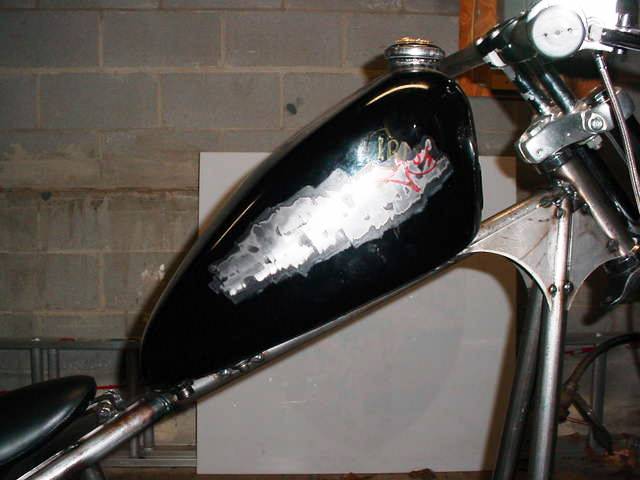
- frisco1.JPG (34.17 KiB) Viewed 7937 times
I cut the mounting tabs off the tank and welded them to the top tube so i could use the original rubber biscuits.
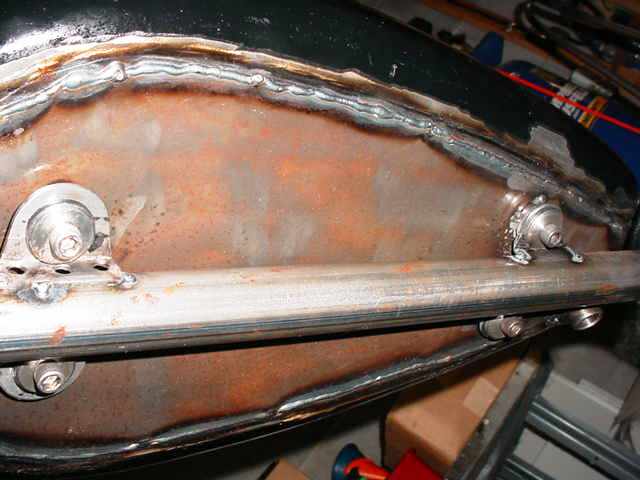
- frisco2.JPG (30.85 KiB) Viewed 7937 times
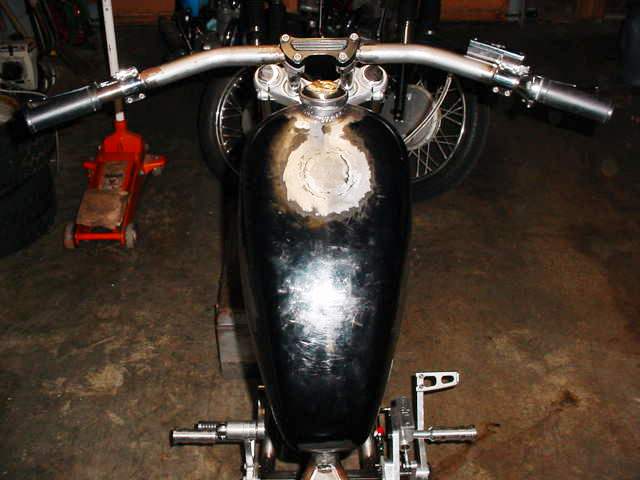
- frisco3.JPG (34.52 KiB) Viewed 7937 times
Those are the handle bars I built but never used. I ground on the welds too much where I put them together and it would have been too much to polish them for chrome - it couldn't really be done according to the chrome man. They could be painted or powder painted. I still have them.
- frisco4.JPG (32.63 KiB) Viewed 7937 times
Re: Irish's CBH Old School Chopper Project
Posted: Sat Jan 14, 2012 4:34 pm
by IRISH
I built the seat mounts and got the brakes installed.
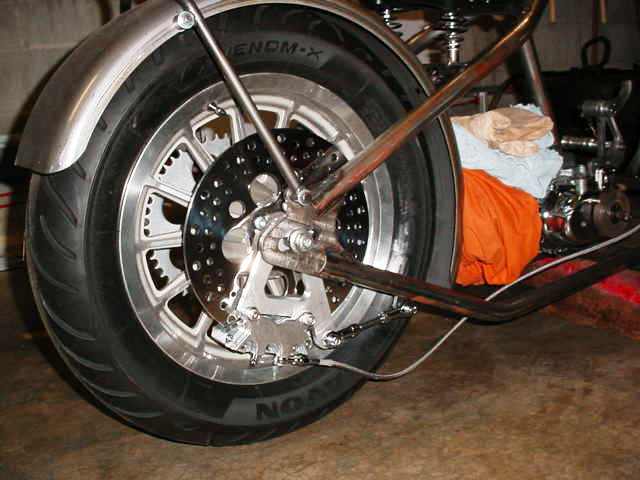
- MVC-680S.JPG (33.49 KiB) Viewed 7936 times
- MVC-681S.JPG (33.5 KiB) Viewed 7936 times
View from the saddle.
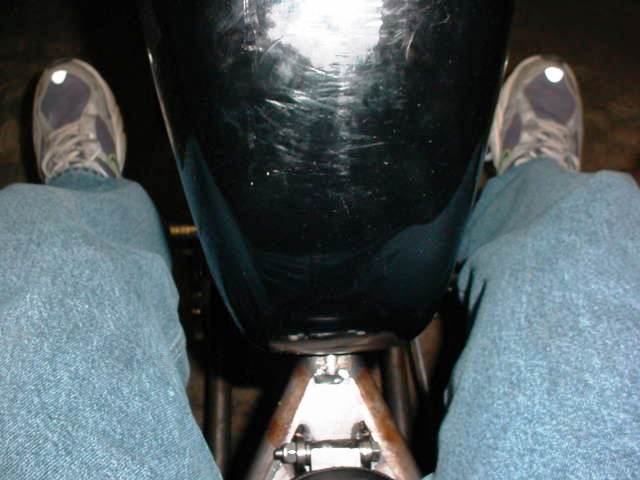
- MVC-675S.JPG (33.97 KiB) Viewed 7936 times
Also bought an oil tank and mocked up to get a look.
- MVC-659S.JPG (32.77 KiB) Viewed 7936 times
- MVC-671S.JPG (34.48 KiB) Viewed 7936 times
I sold my beloved El Camino and bought a Harley Evolution crate motor. 1340cc V-Twin! Bolted it in for a look.
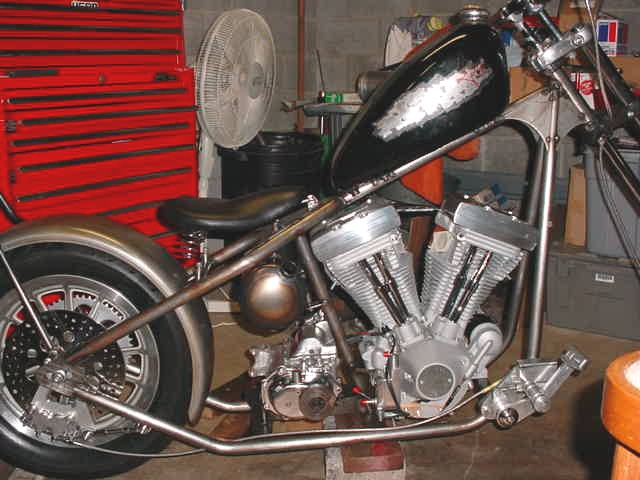
- MVC_704S.JPG (73.44 KiB) Viewed 7936 times
Also got the oil tank mounted.
Re: Irish's CBH Old School Chopper Project
Posted: Sat Jan 14, 2012 5:00 pm
by IRISH